
Online Course in a Website – Hosting your Course in Google Cloud
If you are an educator, eLearning developer or if you create content that you like to share to your audience from your blog, then this post might be interesting for you, because here I’ll explain one way to put your online course in a website using Google Cloud.
If you already have an audience who enjoys your content, it shouldn’t be really hard to get an online training published. You just need to put together relevant information related to a topic of interest to your audience. This information could be easily converted in an eLearning module.
We now have so many tools for this and you won’t need technical skills.
Let’s create something together in this post!
Do I need to be an eLearning developer to create a course?
The answer is no. Technology and tools available in the market are getting easier to use. They are more user-friendly, targeting more users without programming skills and without time to learn new software.
Tools these days are also more cloud-based, so you don’t even need to install anything in your computer, you just need access to internet. Additionally, tools are getting more responsive to mobile users, which is one of the most common ways people are using in order to read and interact with content now.
These authoring tools are more the “drag-and-drop” type of software, where you have pre-built templates you can use, icons, images, interactions and other elements that you simply drag from a menu and drop into your canvas to create a fantastic presentation.
At the beginning, you don’t need to buy any expensive software or equipment. You can start with a free trial account of an authoring tool such as Articulate or Captivate, and then if you like it you can always upgrade and buy your license.
My recommendation is to always try the software first to see if it is what you need before spending the money.
If you don’t want to spend any money, then I recommend you create an account in H5P. This is an open-source tool, cloud-based that will let you create interactive content such as course presentations, interactive videos, memory games, quizzes, charts, flashcards and so much more. All the content you create can be imported into your website.
H5P has plugins in WordPress, Drupal and Moodle. So if you have your website in WordPress, for example, you’ll be able to easily incorporate tools developed in H5P.
How do I create the course?
It is important first to identify a learning objective or what is the main goal you would like your audience to achieve with your eLearning course. It could be, for example, that your website is dedicated to share information about personal finances. In this case, one goal of your eLearning course could be for learners to know how to create a family budget.
In this case, you should build your course around topics such as what a budget is, benefits of having a budget, how to setup a budget, how to track a budget and, I would also include a case scenario presenting a real situation of a family with debts and other commitments and give details on how it would be a budget for this family.
Nothing like a real world example and context to get the ideas across your learners.
You could build your content to cover those topics using PowerPoint. Alternatively, you can use Slides in Google, which is free and you will be able to access from any device.
In this part of the process, try to organize the content, the activities, the interactions and the multimedia elements you will include in your course. Keep it relevant, on target and short so you can keep learner’s attention.
Once you have the layout and content organized, then you can start building your course using the Authoring tool (Captivate, Articulate or H5P, just to name a few).
To learn more about how to build an eLearning course from a PowerPoint, visit this post “How to Build an eLearning Course” which includes a tutorial where I show you how to develop a course using Articulate Rise.
Why do I need to host a course in my website?
If you don’t have a Learning Management System (LMS), which most of the time can be a little bit expensive, and you still want to share your knowledge, engage with your learners and readers in a different way, grow and up skill your audience in a more formal way through online learning, then it is really advantages to build a course and make it accessible through your website.
The LMS will offer the option of bookmarking, which is saving the progress of learners through the training. This basically means, that if learners decide to stop the online module and come back later to continue, they can perfectly do it, and still their progress will be saved so they can resume where they left off.
This is a great thing to have. But if your course is short and your learners can do it at once, then hosting your course through your website without LMS in the middle is an option to consider.
How can I monitor who has done my training?
Additionally, if you still want to track who has done your training, you could add in your module a link to a Survey Monkey form, or use any other platform to build forms online, and include the link to the form at the end of the course. Once learners complete the course, they will fill out the form that will send you a notification about their completion.
For the example I use in this post, I included at the end of the module a form built in JotForm to record learner’s completion.

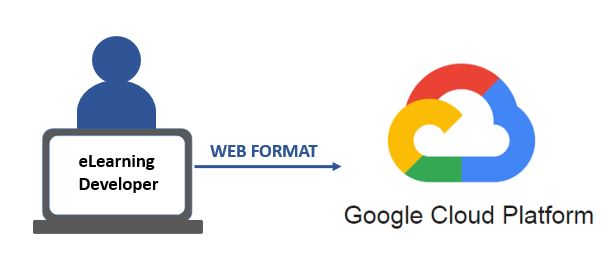
Also, remember to publish your course for the web. I used Articulate Rise to develop this module and I selected “Web” in the publishing options.

In the post “How to Build an eLearning Course” I showed the process of publishing the course for a Learning Management System. But in this case, we are using the option for the “Web”, which provides a ZIP file.
Procedure to host your course in Google Cloud
One option to make your course available through your website is with Google Cloud. First, you need to create an account in Google and open the tool “Google Cloud”.
Go to the console to see your dashboard which is your main working area. Here you have access to lots of tools.

Create your new project and give it a name. It could be the name of your online course. Then, click on “Open”.

Then click on the icon at the top left, and click on the option “Storage”.

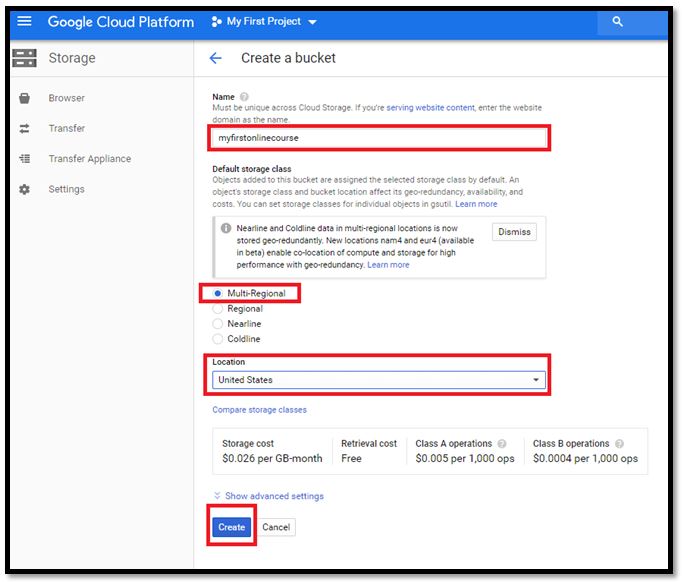
Create a bucket.

Enter a name for your bucket. This name must be unique globally, but Google will indicate if you need to enter something different. Select “Multi-regional”, select your location and click on “Create”.
Change the “Permissions” of your bucket to “Storage Object Viewer”. This will give access to your learners to see the content of this bucket without issues. To do this, select your bucket, click on the 3 dots at the end of that line, and click on the option “Edit bucket permissions”.

In “Add members” type “allUsers”. Select the option “Storage Object Viewer” and click on “Add”.

Now, we click on “Upload Folder” and I’m going to upload the entire course folder which I have already UNZIPPED.

You will see a pop-up message about the number of files inside your course folder. Click on “Upload”.

Open the folder of your course and find the file “index.html” if you developed your course in Articulate Rise, or “story.html” if you developed it in Articulate Storyline. Copy the link to this file.

This link is the one you will include in your website to let your learners launch the course.

What are the costs of Google Cloud?
The price depends on how much space you will use per month. The free option offers 5 GB per months which is a lot for a simple course. If you use more than that, it still very cheap. Check the pricing table here.
Other options
If you still think this procedure is not the solution for what you want to do with course and how you want to deliver it, then you have other options such as:
Option 1: Use the open source LMS Moodle. If your website was built with WordPress, you can install the plugin for Moodle and share your courses in this way.
Option 2: If you don’t want to use a LMS because it might require extra technical skills and it can be time-consuming to configure, then you can still host your course in a web server. There are many web server providers. Make sure they provide the service you need, with security certifications, data protection. You can check this information in the “Terms of Service” of these companies. One web server provider that includes the WordPress hosting is Liquid Web. Remember to add a form at the end of your course if you want to monitor who completed the training.
Option 3: Use SCORM Cloud to host your courses, as I explained in the post “Scorm Cloud – Review“.
Option 4: And finally, the last option I’ll suggest today is using Thinkific, which is like a cloud-based LMS, but is really simple and easy to use. They will let you enroll users, run reports, customize your courses, add social media tools to your courses and, if you want to sell your courses, they have the functionalities to manage that.
Summary
Here I have explained another way to distribute eLearning to your learners through your website. I think that if you have some skills, content you create, and if you like to help others, why not share those skills and knowledge by creating an online course. It doesn’t have to be super complex or long and still it can offer valuable information to your learners.
In this post, you have also seen the process to upload your course using Google Cloud and I have also presented other options to share your courses. Hopefully, one of these options can be the solution to your situation.
Here a video to summarize the step:
If you have any questions, please feel free to post them below and I’ll reply.
Thanks for visiting and reading.
See you next time.
Thais 🙂
8 Responses
This is really goo. Nearly everything a course maker needs to take off in building an eLearning platform. A good job with the video too.
Thanks Chyke! I tried to cover as much as possible, or at least the general view and basic steps.
Hi Thais,
The information you’ve provided are very useful. Thanks.
I am thinking of setting up a small biz selling learning content. A use case for the prospective customer would be say they make a purchase on the catalog provided at my website, and then get on to view the contents listed.
I was thinking of using Google slides to create learning materials and have them hosted on Google Cloud. But I don’t know how to automate the process from purchase to access of content on Google Cloud.
I have two questions:
1) Do you think I should use software tools such as Captivate or Articulate to create the learning materials instead of Google Slides?
2) Is hosting the learning materials on a custom-built web-site better? Cause I feel I may have more control over purchasing, storing and access better.
Please let me know what do you think. Thanks in advanced.
Hi Yuan,
Sorry I have taken so long to get back to you. I’ve been handling some personal issues but I’m not back on track 😀 I would use Articulate or H5p to develop the courses just because these tools will give you more functions to create engaging interactions. Of course always the main thing in your courses is the quality of content but it is important to consider the look and feel. If at the moment you can’t afford Articulate, try H5P.
About the hosting, having a custome built website would be better or maybe use some of those gorgeous templates in WordPress that have online stores and layouts already built. I hope your business takes off, please feel free to share your link once is ready. I would love to check it out ? all the best.
Thais
Hi Thais,
I have another question.
What software do you use to draw the lines, arrows and boxes like those in this tutorial?
Thanks again in advanced.
I use Articulate and PowerPoint ? I’m still a little bit of old school.
Once I do this, and have the url, does that mean my course is on the internet for ANY person to access? Or will I be able to, say, create usernames and passwords to enable/disable who can access my course?
Hi John,
With this methodology, any person with the URL can access and do your course. But there are other ways to use a password to protect your eLearning module. Please check this amazing resource with more information about this approach: https://upwardonlinelearning.com/password-protect-storyline-e-learning-course/