
How to Build an eLearning Course – In Less than 30 Minutes
In this post you will learn how to build an eLearning course in less than 30 minutes and I will explain the steps to publish your course for a website or a Learning Management System (LMS).
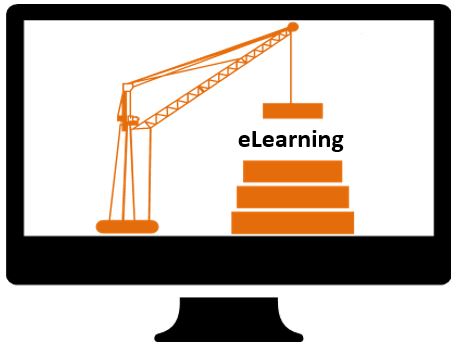
If you have zero experience, then this post is for you.
What You Will Need
In this example I will be using the software “Articulate 360” which has different products such as Storyline, Peek, Rise, Replay and Studio. But in this case, I will be using Rise because it is so easy to build courses with this tool. You don’t need graphic design skills and still you will achieve a professional look, ideal for the web, with a progress bar and some simple animations that will impress your learners without putting too much effort during the development stage.
So basically, what you will need is:
- A license to Articulate 360 or, a free trial of this software that will work perfectly for 30 days.
- The content you want to put in your course. I prefer to have the initial drafts of my content in a PowerPoint document and use the notes section to explain the dynamics of the slide such as narrations, animations and any other explanations relevant to that particular slide.
- A computer with internet because Rise is a cloud based tool.
Organizing the Content of the Course
If this is your first course, my recommendation is to start with something simple, just a couple of slides would be enough so you get the idea and have the chance to explore the software without getting overwhelm by the length and complexity of the course.
The length of the content will impact directly the duration of your eLearning course. I always recommend keeping the most important information in the eLearning module and leave the not so relevant information in links and attachments for your learners to consult if they want to know more about the topic. The idea is to maintain learners’ attention as much as possible and with so many distractions these days, expecting to keep their attention for 30 minutes is a luxury. So always aim for 20 minutes at the most and leave the rest in attachments, or if you consider that you have lots of relevant information then split the module into smaller modules that will be easier to digest by your learners.
If you are working in PowerPoint to build your content, try to have no more than 20 slides or if you have more than that analyze your content to see if it is possible to group some slides into one tab interaction. For example, elements that are related could be grouped into one tab interaction that will be more interesting for learners to explore in your eLearning module compared to read pages and pages of content.
Additionally, keep your content on target, always focused on delivering the message you want to get across your learners. Remember to always go straight to the point because we don’t want to waste the precious time of our learners.
Regarding images and multimedia elements, Articulate has a really good collection of resources available that you can use even if you are using the trial version. Alternatively, you can use your own resources.
If you are using your own multimedia resources, try to have them all in one folder in your computer so it will be easier to develop and you will have a more organized approach when developing your courses.
With the software and the content ready, let’s start developing the course!
Warning
It is important to know before developing in Rise that your learners will need at least Internet Explorer 11 or Google Chrome to successfully run the online module without technical problems. Older versions of Internet Explorer won’t allow learners to launch the course. That’s why it is so important to know your learners, do a learners needs analysis and understand the technical constrains they might face when doing the eLearning courses.
If possible, before launching your course, you could contact the IT department in your organization to get the browsers upgraded, or simply contact your learners to make sure they have the recommended browser to successfully complete the eLearning courses.
Developing the Course
Once you install Articulate 360, you will get this menu to easily open any of the tools available with the product.
Launch “Rise” from Google Chrome or the latest version of Internet Explorer. I personally have found that Google Chrome is the best navigator for Rise to work properly.

Click on “New Course”.

Add a title to your course and the details. In the details section I only added the duration of the course, but in this section you can also add important information for learners to keep in mind before doing the course, such as a brief description of the course, information about assessments, contact details for technical support and any other relevant instructions.
Type the titles of your lessons and when pressing “Enter” you will get the button “Add content”. This button will give you 2 options, to create a normal lesson or a quiz. Click on the lesson option.


The blank canvas of your lesson will open with a menu presenting the different types of content you can create in your course (text, image, video, list, flashcards, etc).

I have selected the option “List” to summarize the main points of the eLearning module. Try to have variety in your course, add images, text and if possible a short video. Make it interesting and fun.
In the option “All Blocks” you will find other options of content you can create.
Reviewing the Course
To see how your course looks you can click on “Preview”. Make as many changes as required to get the course you and your learners want.
If you want to share your course with others to get feedback, you can use the review functionality where you will publish your course in “Articulate Review”. This will give you a link to your course that you can share with your reviewers. Additionally, they will be able to add their comments in this tool. But remember you will be notified via email for each comment your reviewers post.

I have found this tool so professional and well-structured for me to share courses with project stakeholders and track comments. You can, later on, export all the comments and the history of changes in CSV format or PDF.
Publishing the Course for a Website
Once you gathered all the feedback and the course is ready, you have the option to publish it for a website. The process is as simple as clicking on “Export” and selecting the option “Web”. This will give a folder with all the files necessary to run your course. Don’t delete or rename any of those files! Otherwise the course will have problems to run.
You have to put the entire folder in your web server. The file you need your learners to click on to open the course, is titled “story.html5”. So if you have a website, add a link to that file so your learners will click on to run your course.
The problem with running the course from a website is that you won’t have the option to track course completion, unless you add at the end of the course a form that learners need to complete. This form will notify you when they submit it. I will explain this in another post 🙂
If you want to track course completion then you need to host your course in a LMS.

Publishing the Course for a LMS
If you want to track course completion, run reports and have a bookmarking functionality so your learners can leave the course and resume later on where they left off, then you will need a Learning Management System (LMS).
To publish your course for a LMS, simply select the option LMS in the export section. Select the type of standard your LMS can take. All LMS at least accept the format SCORM 1.2 but others can take different formats. If you are not sure, check with your LMS provider or the documentation available. But please, don’t stress about this, in future posts I will explain more about formats and SCORMs. For now, I would say that as a minimum all LMS take the format SCORM 1.2.
Additionally, you can track course completion depending on quiz results or on the number of slides visited. In this case because I don’t have a quiz, I have selected the option of tracking course completion at 100% which means that for learners to complete the course they must view all the slides.
And finally, I have turned on the option of having an exit button that will appear in the top right corner of the course.

The result of this will be a zip file that contains all the files of the course. Once again remember that these files shouldn’t be changed or removed unless you are an experienced developer. Otherwise, your course will encounter issues when running.
Load your zip file in your LMS and invite or enroll your learners from your LMS.
Video Tutorial
Conclusion
In this post, I just wanted to show you the main steps to build an eLearning course using Articulate Rise. The purpose is to show you that it is not rocket science and that you actually can do this. You just need a simple content to start with so you can get familiar with the software and explore the different options of content within the lesson builder. I have also provided an overview on how to publish your course for a web or LMS.
I hope you find this information useful 🙂 and feel free to leave your comments below or ask any question. I’m always happy to help.
See you next time.
Thais
7 Responses
Hi Thais, thanks so much for sharing your knowledge in this area. I’ve been thinking about creating a course from my website and didn’t know where to start or what program to use. It was just an idea with no where to go until now. I feel that I still have a long way to go in considering the details but I’m so grateful for your sharing of a program that is available while being able to talk through the processes involved. I’ll definitely be coming back to your site for your wonderfully, valuable information :).
Thanks Kat 🙂 I’m happy to help. If you have any particular question or something you need help with let me know and I might develop a post about it 🙂 cheers
Thais
Hello Thais,
Developing an e-course is something that has been of interest to me. I like how you created a step by step blueprint for people like me who have never used a product such as ‘Articulate 360″ and especially like the visual of the “Sun Smart Heat Hydration” to demonstrate how it’s applied. Thanks for sharing!
I’m glad you liked it. I’ll keep posting more tutorials like this. 🙂
Hi Thais. You are right that even someone, with no experience like me, should be able to build an eLearning course now that you have suggested these great tools to use. Thanks for explaining the process in an easy to follow step by step format. If I have a problem, I will come back to you for more information.
Many thanks.
Yes please, let me know if you try. I’m happy to help 🙂
Much need..imformative..thank you!