
The Rapid Instructional Design Model – My Favorite Model to Get the Job Done
An instructional design model is a framework of work to develop learning solutions. In this post, I will show you the benefits I find in the rapid instructional design model, which is my favorite model to develop eLearning and get the job done.
Why Use an Instructional Design Model?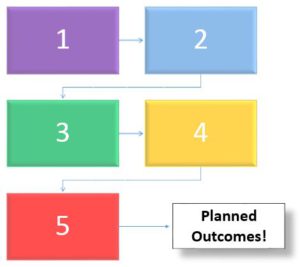
As I explained in the previous post, “Job Description of an Instructional Designer”, in this role we perform activities in different areas, such as consulting with the client, project management, design, develop animations, content, coding, testing, etc.
In order to have an organized approach and to ensure we will deliver the expected final product, we need to follow steps to slowly go through our project. These steps are documented in guidelines or frameworks that are called “Instructional Design Models” and it is good to use one of them to ensure you cover all the details of eLearning development.
So, yes, it is good to use any of the instructional design models, or build your own that suits your needs, or perhaps you could use some approaches of traditional instructional design models to create one that adapts to your needs.
At the end of the day, you are the best person to know how you prefer to work, but my recommendation is that you adopt an instructional design model to guide your work.
If you don’t want to reinvent anything, then you can use a traditional instructional design model.
Traditional Instructional Design Models – ‘ADDIE’ and ‘Dick & Carey’
“ADDIE” is the most famous instructional design model. It was developed in the 1970s, and is an acronym for the 5 stages of the development process: Analysis, Design, Development, Implementation and Evaluation.
- Analysis: identify problem, gaps in knowledge or performance, develop learning outcomes.
- Design: create a sequence or flow of the content, identify or design the instructional strategies, methods, materials, media and assessments.
- Development: create the learning assets. Perform functionality and usability tests and review.
- Implementation: the eLearning course is deployed in a Learning Management System or a website, learners are enrolled. The course is rolled-out, delivered and completed.
- Evaluation: data (surveys, status report) is gathered to gain insights about the effectiveness of the course. This information can be used for future improvements.

ADDIE is not the only instructional design model, but it does serve as a foundation for many other models.
Another famous model is the “Dick and Carey Instructional Design Model”. This model is a systematic approach that assumes that training is required and presents 10 steps for the design of the instruction (Cowell, Hopkins, McWhorter, & Jorden, 2006). The 10 steps are:
- Identify instructional goals.
- Conduct instructional analysis.
- Analyze learners and contexts.
- Write performance objectives.
- Develop assessment instruments.
- Develop instructional strategy.
- Develop and select instructional materials.
- Design and conduct formative evaluation of instruction.
- Revise instruction.
- Design and conduct summative evaluation.

ADDIE vs. Dick and Carey Model
The Dick and Carey model has some similarities with the ADDIE model in the sense that both models identify a problem or goal, work through the steps of the model, and conclude with a summative evaluation (Cowell, Hopkins, McWhorter, & Jorden, 2006).
Another similarity is the system approach of both models, where there is a focus on the inputs of each step that affect the inputs of the next steps. Also, the output of both models is what the learner needs to know at the end of the instructional experience. And the last element of the system approach in both models is the process where the instruction is designed to be delivered in different occasions and not exclusively for one particular situation (Utami, 2013).
On the other hand, the main differences are in the number of steps where the Dick and Carey model has more detailed steps than the ADDIE model; and the evaluation phases where the ADDIE model has an evaluation process in its final phase, whereas the Dick and Carey model has evaluations throughout each phase of the model (Leiker, n.d.).
Due the detailed nature of the Dick and Carey model, I would prefer to use this model in situations where it is necessary to analyze thoroughly each step of the design process. Perhaps, in educational settings this model could be a perfect fit to design a course about a complex topic that requires an extensive analysis of the interrelation between learner, context and instruction.
Another context that might require this level of detail could be the military sector where there is a need to develop instruction in the use of a particular equipment or protocol that is complex and can be better designed using a systematic, detailed and iterative approach.
The Rapid Instructional Design Model
With modern software and authoring tools like Adobe Captivate and Articulate 360, designers can create and modify prototypes with more efficiency. S. Tripp and B. Bichelmeyer (1990) proposed using rapid prototyping as an instructional design model.
According to this model, learners’ needs, content and objectives are determined as the prototype is constructed and utilized, rather than prior to development. Tripp and Bichelmeyer emphasize that testing instructional materials that are near completion, is not as efficient as rapid prototyping.

Like the ADDIE model, the rapid prototype model starts with the analysis stage where training needs are identified. During the design stage a prototype of the course visualizes the user interface and provides a template of the course. The overlapping boxes are meant to represent the fact that the various processes do not occur in a linear fashion.
In other words, the analysis of needs and content depends in part, on the knowledge that is gained by actually building and using a prototype of the eLearning course.
This model allows all team members to be involved in the design model of the eLearning solution. Early feedback is provided, reducing the time required in development and implementation.
This model enables the client to get an earlier view of the actual course and its main components.
With this model, developing a prototype is practically the first step, while front-end analysis is generally reduced or converted into an ongoing, interactive process between subject-matter experts, objectives and materials.

When Should I Use this Model?
This model works best for:
- Process and knowledge based learning.
- Product knowledge training.
- Procedural training.
- Induction.
- Technical knowledge.
- Behavioral and soft skills training.
You can also use this model when you have tight time frames, limited resources and when you already have templates or pre-built content you can reuse.
How Can I Build a Prototype?
You can use PowerPoint or Slides to build your prototype, or if you are familiar with an authoring tool software, such as Captivate or Articulate, then I would start the prototype with one of these tools.
The rapid prototype model is also called “Rapid eLearning”. With this rapid model you can organize the content following these steps:
- Step 1 – Get attention: Grab attention by asking a relevant question on the subject or related to prior knowledge. Other ways to grab attention is by presenting a relevant fact, shock statement, image, video or important statistic.
- Step 2 – Set direction: Be clear about what you are going to cover and how it will benefit the learner.
- Step 3 – Present: Present all the relevant content concisely. In depth information should be added as attachments, additional resources or supplementary web links.
- Step 4 – Show and Try: Demonstrate the learning through example or case study how the knowledge should be used. Ask questions to check comprehension.
- Step 5 – Summarize: Give a clear wrap of the key information.
- Step 6 – Action and Support: Show what to do next and where to get more support.
In Summary
Many experienced instructional designers take the best elements of several instructional design models and adapt them, depending on the circumstances and personal preferences.
Additionally, choosing the best model to use will also depend on the team in charge of developing the instructional experience, the resources and information available. I think there is no model better than the other, but it is always good to know the variety of models available that could be used depending on each particular situation.
The rapid prototype creates an early iteration loop that provides valuable feedback on the effectiveness of instruction and design. This design method makes the design and development process open to new emerging ideas.
Would you use this model to develop eLearning? Leave your comments below 🙂
See you next time,
Thais
References:
Cowell, C, Hopkins, P. C., McWhorter, R., & Jorden, D. L. (2006). Alternative training models. Advances in developing human resources, 8(4), 460–475.
Leiker, D. (n.d.). Summary and comparison: ADDIE vs. Dick & Carey model. Retrieved from http://edutech.tips/summary-and-comparison-addie-vs-dick-carey-model/
Utami, H. B. (2013). The comparison of ADDIE model and Dick and Carey Model in designing a curriculum [Blog post]. Retrieved from http://gittahuri.blogspot.com.au/2013/01/the-comparison-of-addie-model-and-dick.html
2 Responses
I have done 15 courses by eLearning but didn’t know the instructional design model behind them.
From reading your post I guess it was ADDIE.
You have been helpful in making understand models.
Hi Ahimbe,
Yes ADDIE is the most common model used by instructional designers but I guess we can change it to suit our work environment.